24
RU
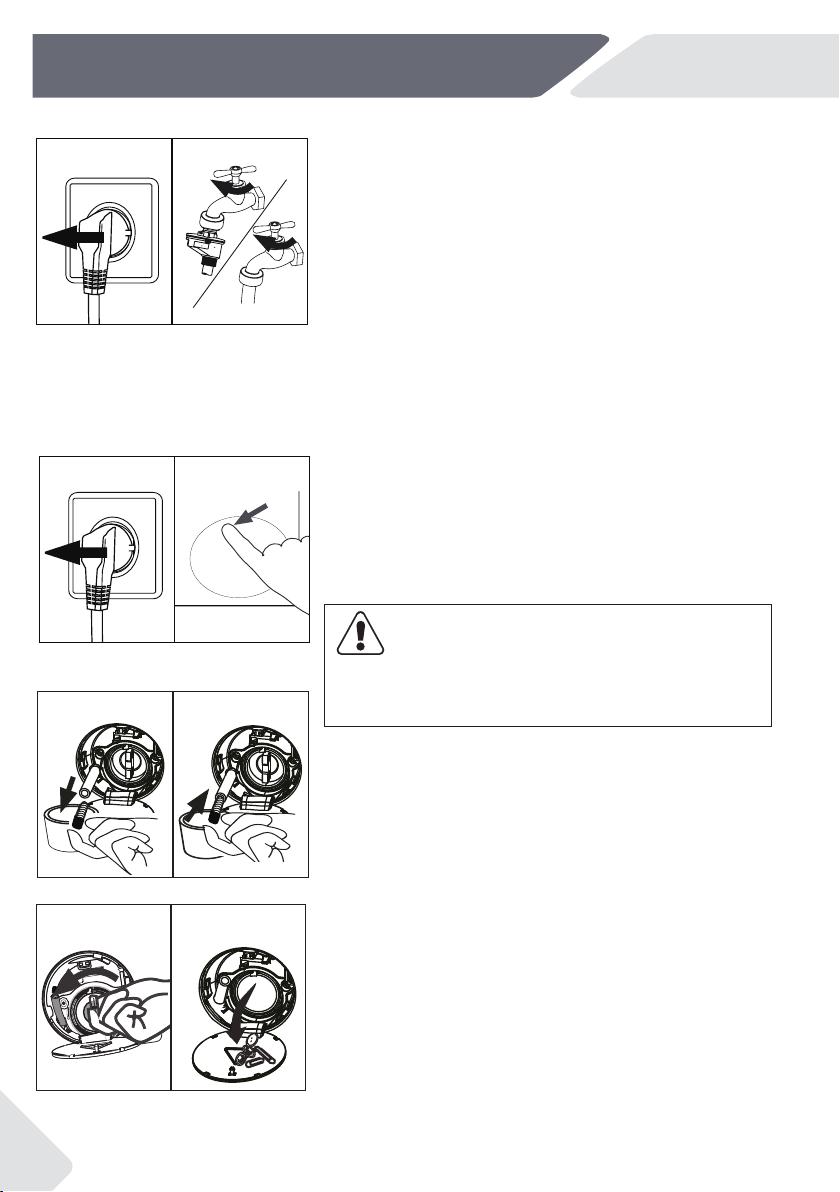
9.5 Длительное неиспользование
Если машину не планируется использовать
в течение длительного времени, необходимо
выполнить следующую подготовку:
1. Выньте электрическую вилку из розетки (Рис. 9-6).
2. Отключите подачу воды (Рис. 9-7).
3. Откройте дверцу, чтобы предотвратить скопление
влаги и появление запахов. Оставляйте
дверцу открытой, когда стиральная машина не
используется.
Перед следующим использованием внимательно
проверьте кабель питания, подачу воды и сливной
шланг. Убедитесь, что все установлено надлежащим
образом, и утечки отсутствуют.
9.6 Фильтр насоса
Очищайте фильтр раз в месяц и проверяйте фильтр
насоса в тех случаях, когда машина:
fНе сливает воду.
fНе выполняет отжим.
fИздает необычный шум во время работы.
ВНИМАНИЕ!
Риск ошпаривания! Вода в фильтре насоса может
быть очень горячей! Перед выполнением любых
действий убедитесь, что вода остыла.
1. Выключите стиральную машину и выньте вилку
шнура питания из розетки (Рис. 9-8).
2. Нажмите и откройте сервисную крышку (Рис. 9-9).
3. Подставьте плоскую емкость для слива воды
(Рис. 9-10). Объем сливаемой из фильтра воды
может быть достаточно большим!
4. Вытяните сливной шланг и держите его конец
над емкостью (Рис. 9-10).
5. Выньте заглушку из сливного шланга (Рис. 9-10).
6. После полного слива воды закройте сливной
шланг (Рис. 9-11) и уберите его обратно внутрь
машины.
7. Поверните фильтр насоса в направлении против
часовой стрелки и извлеките его (Рис. 9-12).
8. Удалите загрязнения (Рис. 9-13).
9.5 Long periods of disuse
If the appliance is left idle for a longer period:
1. Pull out the electrical plug (Fig. 9-6).
2.
3. Open the door to prevent formation of moisture
and odours. Let door open while not used.
Before next usage check carefully power cord, water
inlet and drain hose. Make sure everything is properly
installed and without leakage.
9-6 9-7
9-Care and cleaning EN
24
1.
2. Push and open service flap (Fig. 9-9).
3. Provide a flat container to catch leach water
(Fig. 9-10). There could be bigger amounts!
4. Pull the drainhose out and hold its end above the
container (Fig. 9-10).
5. Take the sealing plug out of the drainhose (Fig.
9-10).
6. After complete drainage close drainhose (Fig.
9-11). and push it back into the machine.
7. Unscrew and remove counter clockwise the pump
8. Remove contaminants and dirt (Fig. 9-13).
WARNING!
hot! Before any action please ensure water has
cooled down.
for instance if the appliance:
▶Doesn´t drain the water.
▶Doesn´t spin.
▶Cause unusual noise while running.
9
9
9
9-10 9-11
9-12 9-13
9-8 9-9
9
9.5 Long periods of disuse
If the appliance is left idle for a longer period:
1. Pull out the electrical plug (Fig. 9-6).
2.
3. Open the door to prevent formation of moisture
and odours. Let door open while not used.
Before next usage check carefully power cord, water
inlet and drain hose. Make sure everything is properly
installed and without leakage.
9-6 9-7
9-Care and cleaning EN
24
1.
2. Push and open service flap (Fig. 9-9).
3. Provide a flat container to catch leach water
(Fig. 9-10). There could be bigger amounts!
4. Pull the drainhose out and hold its end above the
container (Fig. 9-10).
5. Take the sealing plug out of the drainhose (Fig.
9-10).
6. After complete drainage close drainhose (Fig.
9-11). and push it back into the machine.
7. Unscrew and remove counter clockwise the pump
8. Remove contaminants and dirt (Fig. 9-13).
WARNING!
hot! Before any action please ensure water has
cooled down.
for instance if the appliance:
▶Doesn´t drain the water.
▶Doesn´t spin.
▶Cause unusual noise while running.
9
9
9
9-10 9-11
9-12 9-13
9-8 9-9
9.5 Long periods of disuse
If the appliance is left idle for a longer period:
1. Pull out the electrical plug (Fig. 9-6).
2.
3. Open the door to prevent formation of moisture
and odours. Let door open while not used.
Before next usage check carefully power cord, water
inlet and drain hose. Make sure everything is properly
installed and without leakage.
9-6 9-7
9-Care and cleaning EN
24
1.
2. Push and open service flap (Fig. 9-9).
3. Provide a flat container to catch leach water
(Fig. 9-10). There could be bigger amounts!
4. Pull the drainhose out and hold its end above the
container (Fig. 9-10).
5. Take the sealing plug out of the drainhose (Fig.
9-10).
6. After complete drainage close drainhose (Fig.
9-11). and push it back into the machine.
7. Unscrew and remove counter clockwise the pump
8. Remove contaminants and dirt (Fig. 9-13).
WARNING!
hot! Before any action please ensure water has
cooled down.
for instance if the appliance:
▶Doesn´t drain the water.
▶Doesn´t spin.
▶Cause unusual noise while running.
9
9
9
9-10 9-11
9-12 9-13
9 - Уход и очистка
 Haier HW60-BP12959BS
  Haier RTXS G584TMHR-07
  Haier HWD80-BP14959B
  Haier HW60-BP10959B
  Haier HWD70-BP14929B
 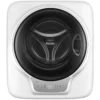 Haier HW30-BP7407
  Haier HW60-BP12919A
  Haier RTXS G382TM/1-07
  Haier HW80-BP14969B
  Haier HW70-BP12959AE
  Haier HW65-BP129301A
  Haier HW70-BP12959B
  Haier HWD100-BD1499U1
  Haier HW70-BP12919
  Haier HW90-BP14929B
 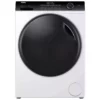 Haier HWD80-BP14959A
  Haier HW70-BP12269
  Haier HW70-BP12959BE
  Haier HWD70-BP14929A
  Haier HW65-BP129302A
Добавить комментарий