17
RU 7 - Повседневное использование
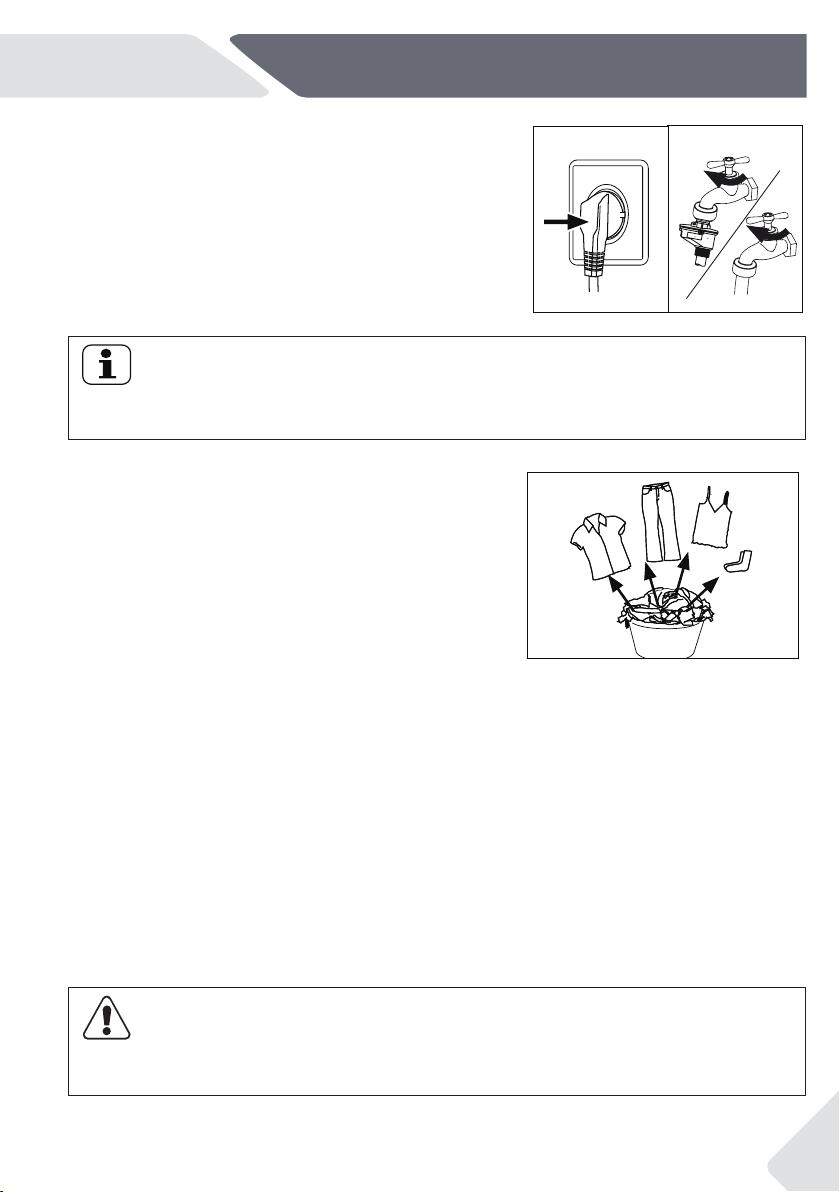
7.1 Подключение электропитания
Подключите стиральную машину к источнику
электропитания (220-240 В переменного тока
частотой 50Гц, Рис. 7-1). См. также раздел
«УСТАНОВКА» (стр. 10).
7.2 Подключение подачи воды
fПеред подключением проверьте чистоту и
прозрачность воды на входе.
fОткройте кран (Рис. 7-2).
Примечание: Герметичность
До начала пользования машиной откройте кран и убедитесь в отсутствии утечек
всоединении крана с наливным шлангом.
7.3 Подготовка белья к стирке
fРассортируйте белье и одежду по типам
тканей, из которых они изготовлены (хлопок,
синтетические ткани, шерсть или шелк и пр.),
а также по степени загрязненности (Рис.7-3).
Обратите внимание на указания по уходу и
стирке на этикетках одежды.
fОтделите белые ткани от цветных. Цветные
ткани попробуйте сначала постирать вручную,
чтобы выяснить, насколько они подвержены
обесцвечиванию.
fОсвободите карманы (от ключей, монет и пр.) и
снимите твердые декоративные предметы (например, броши) содежды.
fПредметы одежды с неподшитыми краями, деликатные ткани и ткани тонкого
плетения, например, тонкие занавески, следует поместить в мешок для стирки
деликатных изделий (их лучше стирать вручную или применить сухую чистку).
fЗастегните молнии, липучки и крючки и убедитесь, что пуговицы пришиты прочно.
fПоместите изделия, требующие бережного отношения, например, не имеющие
надежно подшитого края, нижнее белье из деликатных тканей и такие мелкие
предметы, как носки, пояса, бюстгальтеры и т. д. в мешок для стирки.
fРазверните крупные вещи, такие как простыни, покрывала и т. п.
fПеред стиркой выверните джинсы и изделия из набивных, декорированных или
ярко окрашенных тканей наизнанку; их рекомендуется стирать отдельно.
ОСТОРОЖНО!
Нетканые элементы, а также мелкие, непрочно закрепленные и острые предметы
могут привести к порче и повреждению одежды и стиральной машины.
7.3 Preparing laundry
▶Sort out clothes according to fabric (cotton, syn-
thetics, wool or silk etc.) and how dirty they are
--w fo gnillebal erac eht ot noitnetta yaP .)3-7 .giF(
ashing labels.
▶Separate white clothes from coloured ones.
they fade or run.
▶Empty pockets (keys, coins, etc.) and remove
harder decorative objects (e.g. brooches).
▶
into a wash bag to care for this delicate laundry
(hand or dry cleaning would be better).
▶Close zippers, velco fastener and hooks, make
sure the buttons are sewn on tightly.
▶
hem, delicate underwear (Dessous) and small
items such as socks, belts, bras, etc. in a wash
bag.
▶Unfold large pieces of fabric such as bed sheets,
bedspreads etc.
▶Turn jeans and printed, decorated or color-inten-
sive textiles inside out; possibly wash separately.
7.1 Power supply
Connect the washing machine to a power supply
(220V to 240V~/50Hz; Fig. 7-1). Please refer also to
section INSTALLATION (see P10).
7.2 Water connection
▶Before connecting check the cleanliness and clar-
ity of the water inlet.
▶Turn on the tap (Fig.7-2).
Note: Tightness
Before use check for leakage in the joints between the tap and the inlet hose by turning on
the tap.
CAUTION!
Non-textile, as well as small, loose or sharp-edged items may cause malfunctions and
damage of clothes and appliance.
7-3
7-1 7-2
7.3 Preparing laundry
▶Sort out clothes according to fabric (cotton, syn-
thetics, wool or silk etc.) and how dirty they are
-
-w fo gnillebal erac eht ot noitnetta yaP .)3-7 .giF(
ashing labels.
▶Separate white clothes from coloured ones.
they fade or run.
▶Empty pockets (keys, coins, etc.) and remove
harder decorative objects (e.g. brooches).
▶
into a wash bag to care for this delicate laundry
(hand or dry cleaning would be better).
▶Close zippers, velco fastener and hooks, make
sure the buttons are sewn on tightly.
▶
hem, delicate underwear (Dessous) and small
items such as socks, belts, bras, etc. in a wash
bag.
▶Unfold large pieces of fabric such as bed sheets,
bedspreads etc.
▶Turn jeans and printed, decorated or color-inten-
sive textiles inside out; possibly wash separately.
7.1 Power supply
Connect the washing machine to a power supply
(220V to 240V~/50Hz; Fig. 7-1). Please refer also to
section INSTALLATION (see P10).
7.2 Water connection
▶Before connecting check the cleanliness and clar-
ity of the water inlet.
▶Turn on the tap (Fig.7-2).
Note: Tightness
Before use check for leakage in the joints between the tap and the inlet hose by turning on
the tap.
CAUTION!
Non-textile, as well as small, loose or sharp-edged items may cause malfunctions and
damage of clothes and appliance.
7-3
 Haier HW80-B14686
  Haier HW60-BP12929AS
  Haier HW60-BP10959A
  Haier HW60-BP10929BE
  Haier HWD120-BD14378
  Haier HW80-B14279
  Haier HWD80-BP14959B
  Haier HW100-BD14378
  Haier HW70-BP12919
  Haier HW70-BP12969DE
  Haier HW70-BP1439G
  Haier HW70-BP12959DE
  Haier HW65-BP129301B
 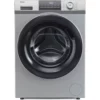 Haier HW60-BP12929ASE
  Haier HW60-BP12758S
  Haier HW60-BP12919B
  Haier HW60-BP12959BS
  Haier HWD80-BP14929S
  Haier HW80-B14979
  Haier HW60-BP12959A
Добавить комментарий