
7
8
Illustration 4
3.3. MOUNTING OF CONNECTION SHEET OF THE INTERIOR CHIMNEY ON THE WALL
Your device has a maximum and minimum height gauge. This height can be calculated by moving the
interior chimney up and down after the distance of your device from the cooker surface is determined. After
the desired height of the interior chimney has been determined, mark the locations to be drilled using the
interior chimney connection sheet in order to fix the interior chimney connection sheet on the wall, and drill
with an auger of Ø6 mm. Bang 2 dowels of 6mm, which came out of mounting accessories, to these holes
with the help of a hammer, without damaging the dowels. Fix the interior chimney connection sheet to these
dowels, again with 2 screws of 3,5x30 which again came out of mounting accessories (illustration 5). At the
end of the mounting of the cooker hood, the interior chimney will be mounted on this connection sheet.
The height of the connection sheet of interior chimney should be within the maximum and minimum values of
your device. The connection sheet of interior chimney should be located in the middle of your cooker as an
axis, and the distances of the right and left spaces should be equal to each other.
Illustration 5
2. Установите вытяжку на место и зафиксируйте ее при помощи винтов.
9
3.4. MOUNTING OF COOKER HOOD ON THE WALL
By lifting the cooker hood holding from its body, hang the hanger sheets on the body to the hanger screws on
the wall. When the cooker hood is lifted, it should not be held from the glasses. Tighten the hanger
screws on the wall (illustration 6). Use a long-end screwdriver to tighten the screws at the points indicated
with C and D in the mounting template (Illustration 7).
Illustration 6
Illustration 7
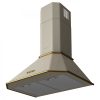 Korting KHC 6839 RGB
 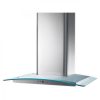 Korting KHC 6954 X
 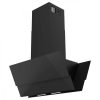 Korting KHA 99750 GN
 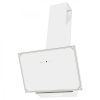 Korting KHC 69059 RGW
 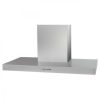 Korting KHC 9957 X
  Korting KHA 39970 W Cylinder
  Korting KHA 39970 N Cylinder
  Korting KHC 6750 RSI
 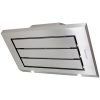 Korting KHC 9959 X
 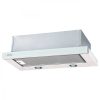 Korting KHP 6617 GW
 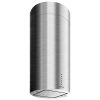 Korting KHA 4970 X Cylinder
 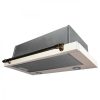 Korting KHP 6617 RB
 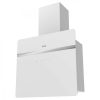 Korting KHC 69131 GXW
 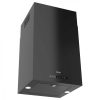 Korting KHA 45970 N Cube
 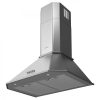 Korting KHC 6839 X
  Korting KHC 6951 X
  Korting KHP 6617 GN
 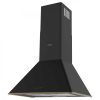 Korting KHC 6648 RN
 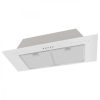 Korting KHI 9931 W
  Korting KHC 9839 X
Добавить комментарий