
7
УСТАНОВКА
Перед установкой убедитесь, что в помещение подведена электроэнергия. Убедитесь в целостности
шлангов (для моделей с возможностью слива конденсата) и электрокабеля. Температура в помеще-
нии не должна опускаться ниже 3°C.
УСТАНОВКА И РЕГУЛИРОВКА НОЖЕК
После того как прибор будет установлен в место
предполагаемого использования, отрегулируйте его по
уровню с помощью инструмента, затем зафиксируйте
положение. Сушильную машину следует устанавливать на
твердой и ровной поверхности.
Разместите сушильную машину вблизи места ее использования удалив упаковочный материал.
ВНИМАНИЕ! ПОСЛЕ УСТАНОВКИ СУШИЛЬНОЙ МАШИНЫ НЕОБХОДИМО ПРОВЕ-
РИТЬ РОВНОСТЬ ЕЕ ПОЛОЖЕНИЯ И УСТОЙЧИВОСТЬ. ДЛЯ ЭТОГО НУЖНО НАДА-
ВИТЬ НА КАЖДЫЙ УГОЛ МАШИНЫ И УБЕДИТЬСЯ, ЧТО ОНА НЕ КАЧАЕТСЯ НИ НА
ОДНОМ ИЗ УГЛОВ.
ВНИМАНИЕ! СУШИЛЬНАЯ МАШИНА ДОЛЖНА БЫТЬ УСТАНОВЛЕНА В ЧИСТОМ
МЕСТЕ, ГДЕ НЕ СКАПЛИВАЕТСЯ ГРЯЗЬ ИЛИ ПЫЛЬ. ВОЗДУХ ДОЛЖЕН СВОБОДНО
ЦИРКУЛИРОВАТЬ. УБЕДИТЕСЬ, ЧТО ВЕНТИЛЯЦИОННЫЕ ОТВЕРСТИЯ НА ПЕРЕД-
НЕЙ СТЕНКЕ И РЕШЕТКА ВОЗДУХОЗАБОРНИКА НА ЗАДНЕЙ ЧАСТИ МАШИНЫ НЕ
ПЕРЕКРЫВАЮТСЯ ПОСТОРОННИМИ ПРЕДМЕТАМИ.
ВНИМАНИЕ! СУШИЛЬНАЯ МАШИНА ДОЛЖНА БЫТЬ РАЗМЕЩЕНА НА ТВЕРДОЙ И
РОВНОЙ ПОВЕРХНОСТИ, ЧТОБЫ СВЕСТИ К МИНИМУМУ ВИБРАЦИЮ И ШУМ В
ПРОЦЕССЕ ЭКСПЛУАТАЦИИ.
ВНИМАНЕНИЕ! НЕ СНИМАЙТЕ НОЖКИ СУШИЛЬНОЙ МАШИНЫ. НЕ УСТАНАВЛИ-
ВАЙТЕ ЕЕ НА КОВРОВОЕ ПОКРЫТИЕ С ДЛИННЫМ ВОРСОМ, НА ДЕРЕВЯННЫЕ ДО-
СКИ И ТОМУ ПОДОБНОЕ. ЭТО МОЖЕТ ПРИВЕСТИ К ПЕРЕГРЕВУ, ЧТО ПОВЛЕЧЕТ
ЗА СОБОЙ ПРОБЛЕМЫ С ЭКСПЛУАТАЦИЕЙ ПРИБОРА.
ВНИМАНИЕ! ПОСЛЕ УСТАНОВКИ И ПОДКЛЮЧЕНИЯ СУШИЛЬНАЯ МАШИНА
ДОЛЖНА БЫТЬ РАСПОЛОЖЕНА ТАКИМ ОБРАЗОМ, ЧТОБЫ РОЗЕТКА БЫЛА ЛЕГКО-
ДОСТУПНОЙ.
7 8
INSTALLATION
Accessories
The following parts are optional for specific models.
If your dryer has following parts, please wear gloves and them
following the instruction below .
install
Hose holder(optional)
Condensing drain
hose(optional)
Use pliers to remove
the drain hose from
the hose connector.
Insert the
external
drainage
hose.
Container
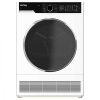
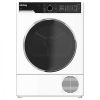
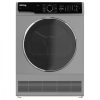
Control Panel
Door
Drum
Power Cord
Handle
Maintenance cover
Air inlet
Top board
Product Description
Max.120cm
200cm
Put the hose holder on the washing
basin or any other sink.
Installation
Lint filter
Transport
Move cautiously. Do not grasp any salient parts of machine. The machine
door can not be used as the handle for delivery.
Installation Position
Level Adjusting
Once in its permanent operating position,
check that the dryer is absolutely level with the aid
of a spirit level. If it is not, adjust the feet with a tool.
Power Supply Connection
1.It is recommended that, for your convenience, the machine is positioned close
your washing machine.
2.The tumble dryer must be installed in a clean place, where dirt does not build up.
Air must be able to circulate freely all round the appliance. Do not obstruct the
front air inlet or the air intake grilles at the back of the machine.
3.To keep vibration and noise to a minimum when the dryer is in use, it should be
placed on a firm and level surface.
4.The feet must never be removed. Do not restrict the floor clearance through
deep pile carpets, strips of wood or similar. This might cause heat built-up which
would interfere with the operation of the appliance.
to
1.Make sure that the voltage of the power supply is the same as the electric specification
2.Do not connect the dryer with the power connection board, the universal plug or socket.
of the dryer.
INSTALLATION
7 8
INSTALLATION
Accessories
The following parts are optional for specific models.
If your dryer has following parts, please wear gloves and them
following the instruction below .
install
Hose holder(optional)
Condensing drain
hose(optional)
Use pliers to remove
the drain hose from
the hose connector.
Insert the
external
drainage
hose.
Container
Control Panel
Door
Drum
Power Cord
Handle
Maintenance cover
Air inlet
Top board
Product Description
Max.120cm
200cm
Put the hose holder on the washing
basin or any other sink.
Installation
Lint filter
Transport
Move cautiously. Do not grasp any salient parts of machine. The machine
door can not be used as the handle for delivery.
Installation Position
Level Adjusting
Once in its permanent operating position,
check that the dryer is absolutely level with the aid
of a spirit level. If it is not, adjust the feet with a tool.
Power Supply Connection
1.It is recommended that, for your convenience, the machine is positioned close
your washing machine.
2.The tumble dryer must be installed in a clean place, where dirt does not build up.
Air must be able to circulate freely all round the appliance. Do not obstruct the
front air inlet or the air intake grilles at the back of the machine.
3.To keep vibration and noise to a minimum when the dryer is in use, it should be
placed on a firm and level surface.
4.The feet must never be removed. Do not restrict the floor clearance through
deep pile carpets, strips of wood or similar. This might cause heat built-up which
would interfere with the operation of the appliance.
to
1.Make sure that the voltage of the power supply is the same as the electric specification
2.Do not connect the dryer with the power connection board, the universal plug or socket.
of the dryer.
INSTALLATION
Добавить комментарий