
9
ЭКСПЛУАТАЦИЯ ВАРОЧНОЙ ПОВЕРХНОСТИ
СЕНСОРНОЕ УПРАВЛЕНИЕ
Панель управления реагирует на прикосновение, не применяйте чрезмерного усилия.
Нажимайте на сенсоры подушечкой пальца.
При нажатии вы услышите звуковой сигнал, это будет означать, что действие произведено.
Убедитесь, что элементы управления чистые, сухие, и что нет объектов (например, посуды,
полотенца), которые закрывают их. Даже тонкая пленка воды может повлиять на работу панели
управления.
НАЧАЛО РАБОТЫ
1. После включения раздастся однократный звуковой сигнал, включатся все индикаторы, что указы-
вает на переход варочной поверхности в режим ожидания.
Нажмите на кнопку Вкл/Выкл
The Control Panel
C6002N C6614N
CT5714N
Product Information
The ceramic hob can meet different kinds of cuisine demands because of heating
element heating, micro-computerized control and multi-power selection, really the
optimal choice for modern families.
The hob centers on customers and adopts personalized design. The hob has safe and
reliable performances, making your life comfortable and enabling to fully enjoy the
pleasure from life.
1. ON/OFF switch 4. Child lock
2. Select power level 5. Select heating zone
3. Setting the timer 6. Dual zone
, индикаторы покажут «▬».
2. Поместите подходящую посуду на зону приготовления, которую вы хотите использовать.
Убедитесь, что дно посуды и поверхность рабочей зоны чистые и сухие.
Выберите зону нагрева, нажав соответствующие кнопки зон нагрева
The Control Panel
C6002N C6614N
CT5714N
Product Information
The ceramic hob can meet different kinds of cuisine demands because of heating
element heating, micro-computerized control and multi-power selection, really the
optimal choice for modern families.
The hob centers on customers and adopts personalized design. The hob has safe and
reliable performances, making your life comfortable and enabling to fully enjoy the
pleasure from life.
1. ON/OFF switch 4. Child lock
2. Select power level 5. Select heating zone
3. Setting the timer 6. Dual zone
, рядом с зоной нагрева
будет мигать значение.
3. Выберите нужный уровень нагрев.
Если в течение 1 минуты нагрев не будет выбран, варочная поверхность автоматически отклю-
чится. Чтобы продолжить, начните с пункта 1.
Во время приготовления в любой момент можно изменять настройки нагрева. Уровень нагрева
регулируется значениями от 1 до 9.
ЗАВЕРШЕНИЕ РАБОТЫ
Выберите зону нагрева которую вы хотите выключить.
Для отключения выбранной зоны нагрева, уменьшите установленное значение до «0». Убедитесь,
что на дисплее отображается «0».
Если вы хотите полностью отключить прибор нажмите на кнопку Вкл/Выкл
The Control Panel
C6002N C6614N
CT5714N
Product Information
The ceramic hob can meet different kinds of cuisine demands because of heating
element heating, micro-computerized control and multi-power selection, really the
optimal choice for modern families.
The hob centers on customers and adopts personalized design. The hob has safe and
reliable performances, making your life comfortable and enabling to fully enjoy the
pleasure from life.
1. ON/OFF switch 4. Child lock
2. Select power level 5. Select heating zone
3. Setting the timer 6. Dual zone
.
ОСТАТОЧНОЕ ТЕПЛО
Символ «H» указывает на горячую поверхность. Он исчезнет, когда рабочая зона остынет до безопас-
ной температуры. Этот индикатор можно также использовать в качестве энергосберегающей функ-
ции: если вы хотите разогреть другое блюдо, поставьте ее на рабочую зону, которая еще не остыла.
Before using your New Hob
• Read this guide, taking special note of the ‘Safety Warnings’ section.
• Remove any protective film that may still be on your ceramic hob.
Using the Touch Controls
• The controls respond to touch, so you don’t need to apply any pressure.
• Use the ball of your finger, not its tip.
• You will hear a beep each time a touch is registered.
• Make sure the controls are always clean, dry, and that there is no object (e.g. a
utensil or a cloth) covering them. Even a thin film of water may make the
controls difficult to operate.
Do not use cookware with jagged edges or a curved base.
Make sure that the base of your pan is smooth, sits flat against the glass, and is the
same size as the cooking zone. Always centre your pan on the cooking zone.
Always lift pans off the ceramic glass – do not slide, or they may scratch the glass.
Using your Hob
To start cooking
• After power on, the buzzer beeps once, all the indicators light up for 1 second then
go out, indicating that the hob has entered the state of standby mode.
1. Touch the ON/OFF switch. all the indicators show “– “
2. Place a suitable pan on the cooking zone that you
wish to use.Make sure the bottom of the pan and the
surface of the cooking zone is clean and dry.
3. Touching the heating zone selection control, and an
indicator next to the key will flash.
4. Select a heat setting by touching the power level control.
• If you don’t choose a heat setting within 1 minute, the hob will automatically
switch off. You will need to start again at step 1.
• You can modify the heat setting at any time during cooking.
When you have finished cooking
1. Touching the heating zone selection that you wish to
switch off.
2. Turn the cooking zone off by touching “-” or slide down the power. Make sure the
display shows”0”.
3.
Turn the whole cooktop off by touching the ON/OFF
control.
4. Beware of hot surfaces
“H” will show which means cooking zone is too hot to touch. It will disappear
Больше
Меньше БольшеМеньше
 Korting HGG 6805 CN
 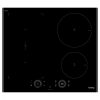 Korting HIB 64750 B Smart
  Korting HG 631 CTX
  Korting HG 465 CTRB
  Korting HGG 6911 CTRW
 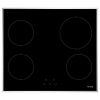 Korting HI 64021 X
  Korting HG 761 CTGN
  Korting HG 697 CTW
 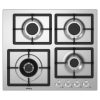 Korting HG 697 CTX
 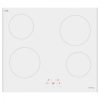 Korting HK 60003 BW
  Korting HG 665 CTGX
 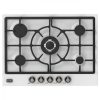 Korting HG 761 CTSI
  Korting HG 665 CTRB
 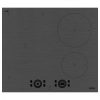 Korting HIB 64870 BS Smart
 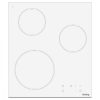 Korting HI 42031 BW
 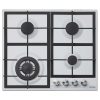 Korting HG 665 CTW
 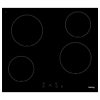 Korting HK 60001 B
 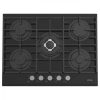 Korting HGG 7835 CTN
  Korting HG 365 CTX
 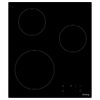 Korting HI 42031 B
Добавить комментарий