
10
4. Выберите мощность нагрева путем перемещения пальца по слайдеру управления уровнем
нагрева.
Если в течение 1 минуты нагрев не будет задан, варочная поверхность автоматически отклю-
чится. Чтобы продолжить, начните с пункта 1.
Во время приготовления в любой момент можно изменять настройки нагрева. Уровень нагрева
регулируется значениями от 1 до 9.
5. Если на дисплее мигает символ
Это означает, что:
Вы не поместили посуду на выбранную зону нагрева.
Используемая посуда не подходит для приготовления на индукционной варочной поверхности.
Диаметр посуды слишком маленький, либо посуда установлена неверно.
Во всех указанных случаях нагрев происходить не будет!
ЗАВЕРШЕНИЕ РАБОТЫ
1. Нажмите на кнопку зоны нагрева, выберите зону, которую вы хотите отключить.
2. Переведите мощность нагрева на «0» путем перемещения пальца по слайдеру управления
мощностью нагрева.
3. Нажмите на кнопку выключения
10
Using your Hob
To start cooking
• After power on, the buzzer beeps once, all the indicators light up for 1 second
then go out, indicating that the hob has entered the state of standby mode.
1. Touch the ON/OFF switch. All the indicators show “– “.
2. Place a suitable pan on the cooking zone that you wish to
use. Make sure the bottom of the pan and the surface of the
cooking zone is clean and dry.
3. Touching the heating zone selection control.
4. Select a heat setting by sliding the power level control.
• If you don’t choose a heat setting within 1 minute, the
Induction hob will automatically switch off. You will
need to start again at step 1.
• You can modify the heat setting at any time during
cooking.
When you have finished cooking
1. Touching the heating zone selection that you wish to
switch off.
2. Turn the cooking zone off by sliding down to”0”. Make
sure the display shows”0”.
.
-
ИНДИКАТОР ОСТАТОЧНОГО ТЕПЛА
Символ H указывает на горячую поверхность. Он исчезнет, когда рабочая зона остынет до безопас-
ной температуры. Этот индикатор можно также использовать в качестве энергосберегающей функ-
ции: если вы хотите разогреть другое блюдо, поставьте ее на рабочую зону, которая еще не остыла.
10
Using your Hob
To start cooking
• After power on, the buzzer beeps once, all the indicators light up for 1 second
then go out, indicating that the hob has entered the state of standby mode.
1. Touch the ON/OFF switch. All the indicators show “– “.
2. Place a suitable pan on the cooking zone that you wish to
use. Make sure the bottom of the pan and the surface of the
cooking zone is clean and dry.
3. Touching the heating zone selection control.
4. Select a heat setting by sliding the power level control.
• If you don’t choose a heat setting within 1 minute, the
Induction hob will automatically switch off. You will
need to start again at step 1.
• You can modify the heat setting at any time during
cooking.
When you have finished cooking
1. Touching the heating zone selection that you wish to
switch off.
2. Turn the cooking zone off by sliding down to”0”. Make
sure the display shows”0”.
12
Using Boost function
The Boost function makes it possible to exploit the hob’s maximum power (for
example to bring water to the boil very quickly).
Activate the boost function
1. Select the cooking area that you want to set.
2. Slide the power level selection to level 9, then slide for half a circle more, display
will show “P”. Now the Boost function is activated.
Cancel Boost function
1. Select the zone with boost function.
2. Slide down the power level to which you want to set.
• Boost function can only last for 5 minutes, after that the zone will go to level 9
automatically.
 Korting HG 797 CTX
  Korting HIB 64940 B Maxi
  Korting HG 761 CTSI
  Korting HG 665 CTSK
  Korting HI 64560 BCH
  Korting HI 6450 BCH
  Korting HI 32003 B
  Korting HGG 6734 CTN
  Korting HG 965 CTRB
 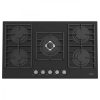 Korting HGG 9835 CTN
  Korting HG 630 CTSB
 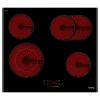 Korting HK 62550 B
  Korting HG 660 CRN
 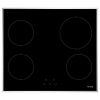 Korting HI 64021 X
 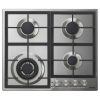 Korting HG 665 CTX
  Korting HI 32003 BW
  Korting HGG 7835 CTN
  Korting HI 42031 B
  Korting HGG 6734 CTW
  Korting HIB 64750 B Smart
Добавить комментарий