
22
Door shelf 1 pc. 2 pc.
Freezer container 5 pcs. 6 pcs.
Container of the refrigerating chamber 1 pc. 1 pc.
Form for ice 1 pc. 1 pc.
Tray for eggs 2 pcs. 2 pcs.
Fastening for a door 1 pc. 1 pc.
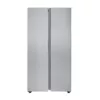
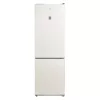
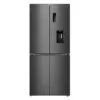
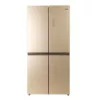
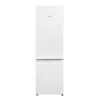
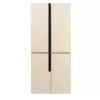
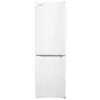
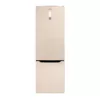
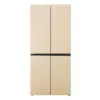
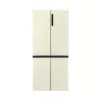
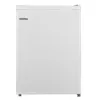
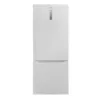
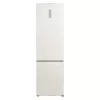
APPLIANCE DESCRIPTION
1. LED-lamp
2. Refrigerator shelves
3. Freshness zone
4. Freezer containers
5. Adjustable feet
6. Door shelves
3. REFRIGERATOR TRANSPORTATION
When transporting or carrying the device, hold it by the bottom and carry
it in an upright position. Do not tilt the refrigerator more than 450 degrees.
Never turn it upside down. Do not place the appliance on the sides or back.
Do not transport the device if it is lying on its side, on the back or on the
front sides. Do not use the door as a carrying aid. This can disable the
device. The two rear legs of the refrigerator are equipped with rollers. To
move around the kitchen and accurately install the appliance in place, tilt
the refrigerator slightly in the direction of the back wall and move it. The
two front legs of the refrigerator can be adjusted in height. In order to align
the device precisely, twist the front legs to the left or right so that the
device is securely on the floor.
After transporting and installing the refrigerator, wait about three hours
before connecting it to the mains to be sure that the refrigerant has
been properly distributed after transportation - this is necessary for the
refrigerator to work properly.
4. INSTALLING THE REFRIGERATOR
Proper installation is necessary to ensure reliable and efficient operation
of the refrigerator. It is necessary to lift the refrigerator by holding it by the
bottom. Do not pull on the door or handle.
The manufacturer’s warranty does not cover damage to the door as a
result of its rearrangement. Repairs caused by such circumstances will be
carried out at the expense of the owner.
OVERHANGING DOORS
ATTENTION!
For rearranging the door, it is recommended to contact a qualified
specialist. If you decide to reinstall the refrigerator door yourself, use the
recommendations listed below in this manual.
Tools required: Philips screwdriver, flat screwdriver, Allen key.
–Remove the cap from the top hinge.
–Remove the top loop. Disconnect the power cable of the displaying.
–Open the top door and carefully lift it up. The door should come off the
hinge and completely disengage from refrigerator.
–Use a screwdriver to remove the middle hinge.
–Remove the freezer door.
–Use a screwdriver to remove the hinge on the bottom refrigerator parts.
Turn over the hinge mount and reinstall the hinge as shown in the figure
below and install him to the opposite side.
–Install the freezer door on the bottom hinge.
–Use a screwdriver to install the middle hinge on the same side as the
bottom loop.
–Place the upper door on the middle hinge. Connect display power cable.
–Use a screwdriver to install the top hinge, on the same side as the rest.
–Place a cap on top of the hinge.
VENTILATION
The compressor and condenser of the refrigerator heat up during operation,
so it is necessary to provide sufficient ventilation to the device.
–The refrigerator should be installed in a well-ventilated room with
normal humidity. It is forbidden to install a refrigerator in rooms with
high humidity, for example, in bathrooms, basements.
–When installing, ensure minimum gaps (3-5 cm) on the sides of the
device and 10 cm on top for free air circulation. Do not block the air
movement at the back of the appliance.
–Do not place near heat sources.
–Do not place the refrigerator in direct sunlight or near heat sources
(kitchen stoves, ovens, fireplaces).
ALIGNMENT
For the efficient operation of the refrigerator, it is important that it is on a
flat surface. After installing the refrigerator in place, adjust its position by
rotating the adjustment supports in its front part. The tilt of the refrigerator
back should not exceed 5°.
CONNECTION TO THE POWER SUPPLY
The refrigerator corresponds to the 1st class of protection against electric
shock and is connected to the electrical supply using a two-pole outlet with
a grounding contact.
–Before connecting to the mains, make sure that:
–The mains voltage corresponds to the data indicated on the special plate
on the back of the refrigerator;
–The grounding contact of the electrical outlet is connected to the
grounding wire of the power supply cable of the electrical network (the
connecting wire must be designed for a current of at least 10 A);
–The socket and plug are of the same type; if the plug does not fit into
the outlet, the outlet should be replaced with the corresponding plug of
the power cord (the work must be performed by a qualified electrician).
The refrigerator must be installed in such a way that you always have
access to an outlet. A refrigerator connected in violation of the safety
requirements of high-power household appliances described in this
manual is potentially dangerous.
The manufacturer is not responsible for damage to health and property if
it is caused by non-compliance with the specified installation standards.
5. REFRIGERATOR OPERATION
BEFORE SWITCHING ON
It is necessary to connect the refrigerator to the mains three hours
after its installation. Thus, the refrigerant will be distributed properly
after transportation – this is necessary for the proper operation of the
refrigerator.
A few hours after connecting the refrigerator to the mains, You can put
products in it.
Remove the transport spacers between the compressor and the back wall
of the niche, as well as other spacers and adhesive tapes that keep the
moving parts of the device from shifting.
If the device has a protective coating of polymer film, carefully remove it,
taking precautions not to damage the paint or polymer coating of the parts.
USING THE REFRIGERATOR
123
1. Temperature setting button
2. “Quick Cooling” mode
3. Cooling modes
–When you turn on the refrigerator for the first time, all the indicators will
light up and then go out, only one indicator will remain lit, indicating the
selected mode, then the refrigerator will automatically start working.
–To change the operating mode, press the temperature setting button in
sequence.
–After selecting a mode, it will automatically turn on after 15 seconds.
–If a malfunction occurs in the device, an error code will be displayed on
the display panel.

Добавить комментарий